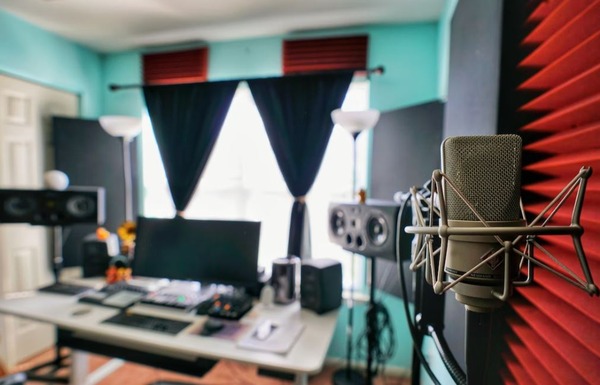
Are you a musician or sound engineer recording in a home studio? If so, then you know that achieving good acoustics is key. Poor acoustics can lead to muddied sounds and poor sound quality, which can be incredibly frustrating. But don’t worry—there are some simple steps you can take to improve the acoustics of your home studio.
Insulation and Soundproofing Materials
The first step in achieving good acoustics is making sure that sound cannot escape from your room or enter it from outside sources. This means adding insulation and soundproofing materials to the walls and doors of your recording space. Adding insulation will help dampen noise that might otherwise pass through walls and windows, while soundproofing materials like foam panels or acoustic tiles will absorb any reflected sounds. This will ensure that no unwanted external noises make their way into your recordings, as well as prevent recordings made in the room from disturbing anyone else in the house.
Flooring
Another important factor in achieving good acoustics is the type of flooring you use in your home studio. Hardwood floors reflect more sound than carpeted floors would, resulting in an echo-filled recording environment. Some may prefer this for their recording environment. If so, make sure your hardwood floors are up to date and don’t creek. The last thing you need is to step back onto a squeaky floor board. Consider an upgrade by professionals like Rejuvenation Floor & Design if you find yourself in this predicament. If possible, try to add area rugs or carpet runners on top of the existing flooring for even better acoustic results.
Bass Traps and Acoustic Panels
Bass traps are large absorbers specifically designed to absorb low frequency sounds which tend to reverberate around a room much more than higher frequencies do. Bass traps should be placed strategically around the room—in corners and behind speakers—to ensure that low frequencies are properly dampened so they don’t overwhelm other elements of your mix. In addition, acoustic panels can be placed strategically around the room to absorb high frequency sounds that might otherwise bounce off walls causing unpleasant echoes or reverb effects. These panels come in various sizes and shapes so it’s easy to find something that fits your space perfectly while still providing excellent acoustic performance.
Reducing Background Noise
Finally, it is important to consider any potential sources of background noise that could interfere with your recordings. Start by inspecting all doors, windows, and vents for any potential gaps or leaks that could let in outside noise – if you find any, then seal them off with weatherstripping or other insulating material. You should also ensure that all electronics (e.g., computers) are situated away from microphones so that their fans don’t cause interference during recording sessions. Additionally, it is worth investing in some high-quality headphones so that you can hear exactly what sounds are being captured during production without having to worry about outside noise contamination.
Achieving good acoustics takes time and effort but it is worth it for any musician who wants their recordings to come out sounding clear and professional-quality every time! By adding insulation, installing bass traps and acoustic panels around the room, and investing in quality soundproofing materials for doors and windows, you’ll be able to create an optimal recording environment without spending a fortune on expensive equipment or professional studios. With these tips under your belt, success will surely follow!
